---------------------------------------------------------
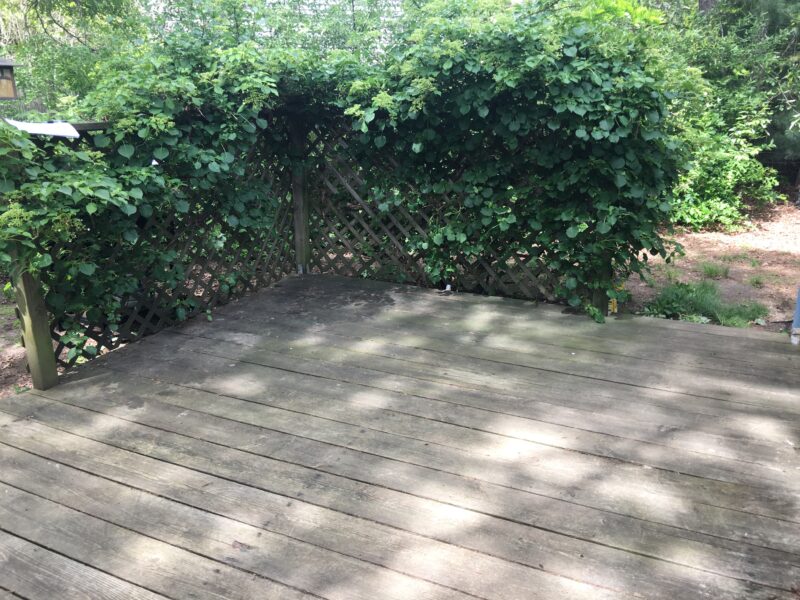
Here in New England, we need to take advantage of every fleeting moment of summer to help us get through the winter! So having a comfortable place to spend time outdoors is a must. A couple of years ago, the cushions for my patio set were pulled apart while stored in my shed during a particularly cold winter by some animal looking for warmth. I have been meaning to do something with my depressing deck since then because this is how it has been looking:
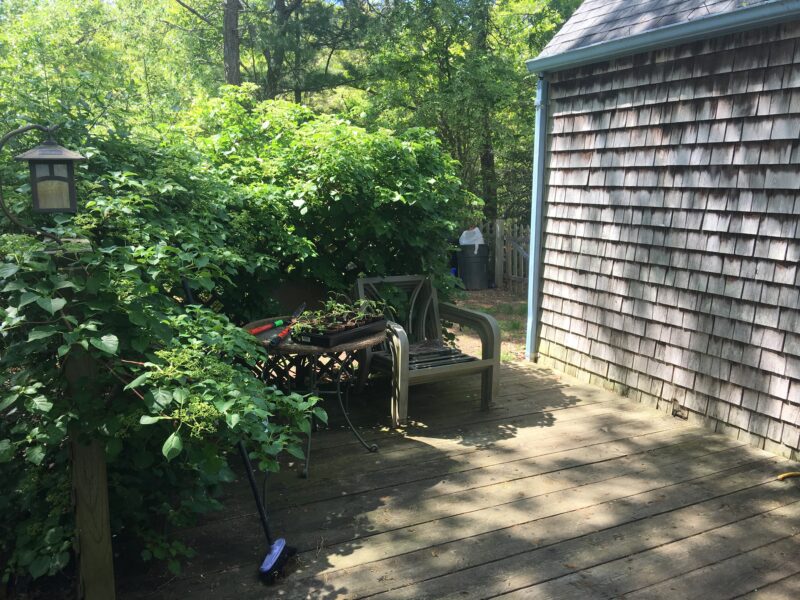
My climbing hydrangea was super overgrown and taking over, and it has just become just a storage space for random garden things.
Step 1 was easy and best of all free! I trimmed back the hydrangea, found a home for all the random things, and gave the deck a good sweep

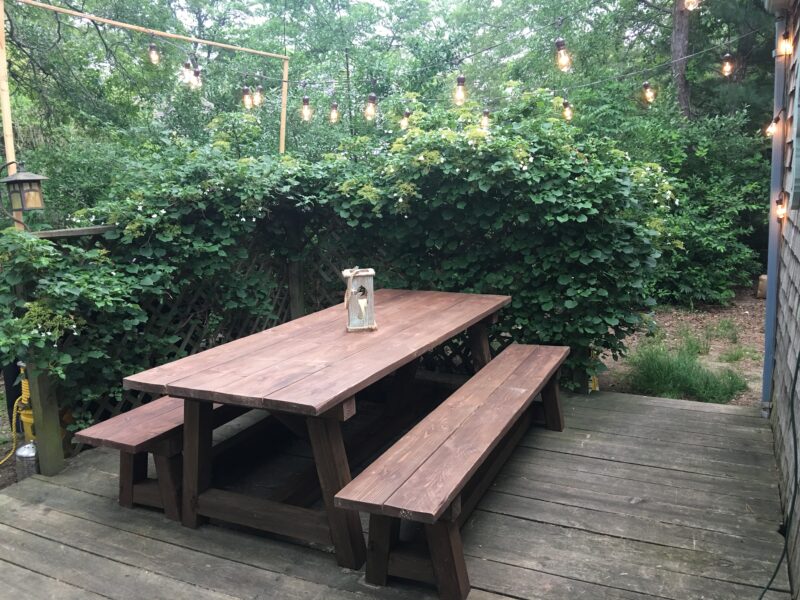
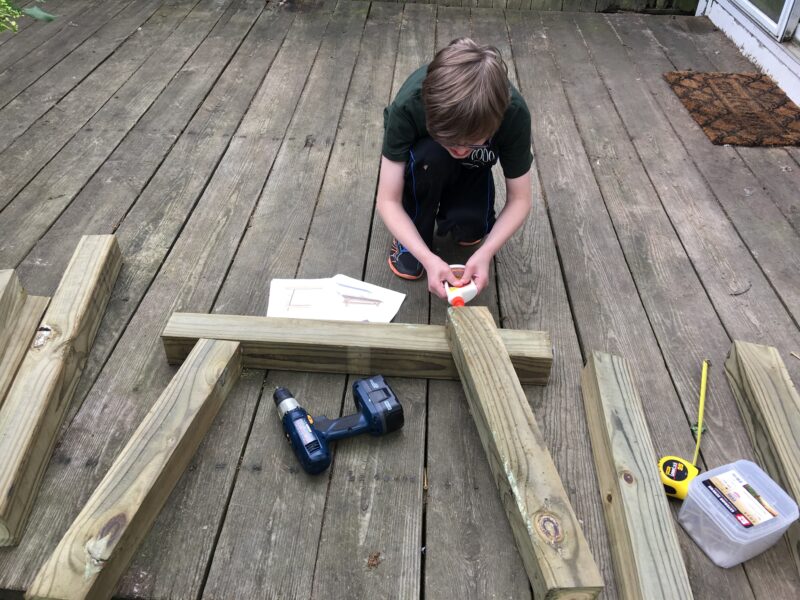
What I was really hoping for on my deck was a nice place for my family and me to eat outdoors. We are a pretty large family, so I was looking around at patio sets and everything I found was either too small, too flimsy looking, or too expensive. My thrifty Yankee spirit knew I could build something way better than the sets I could afford. I wasn’t going to let the facts that I had never built a table or bench and that I have only minimal carpentry skills stop me.
I am no stranger to DIY and have never been afraid to tackle a project so I set out to find plans. My *favorite* blog for DIY is Ana-White.com , if you enjoy working with your hands and building things I would 100% recommend browsing around her site. Her plans are free and really easy to follow, even if you are a beginner! I have made a couple of projects with her plans, and she once again didn’t let me down, I found plans for this super cute Truss Table & Benches.
The only change I was going to make to her plan was to not do the separate “breadboard” ends because I wasn’t confident I could attach them securely. I made up my list and headed to the lumber yard. For the base legs and trusses, I used pressure treated 4x4s, and for the top untreated pine. In total, for all the wood, screws, stain, and taxes it came to only $195! I was super excited and couldn’t wait to start building!
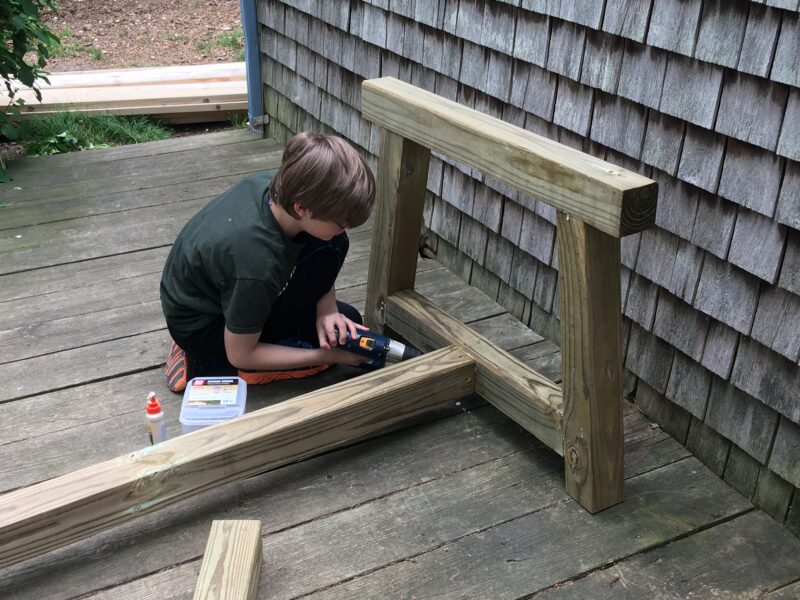
My husband was out for the day and I didn’t want to wait til the next day to get started when he could help me. But the boards were long and awkward to handle alone so I really needed a helper. Luckily, my youngest was home and loves to help out. Well, he did way more than help carry wood – he ended up pretty much building the whole thing! I did all the cutting with the table saw, and gave him direction on how to use the tools and he just took it from there. It was a great mother-son bonding afternoon! 🙂
While we were getting ready to attach the top boards to the table, we heard the most wonderful sound a 12 year old boy can hear on a warm summer day.

Why does overpriced ice cream from a truck always taste so much better than coming from your freezer? The ice cream man’s timing was perfect, an ice cream break was just what we needed!
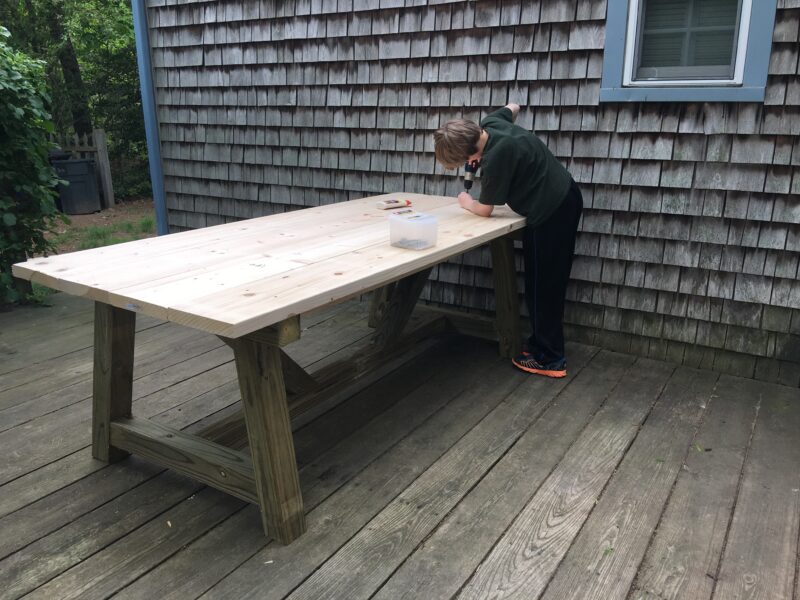
It took us about 3 hours to make the table from start to finish including an ice cream break.
We decided to tackle the benches the next day, they are basically the same thing, only smaller. We were better at it now, so we were able to make both benches in about 3 hours.
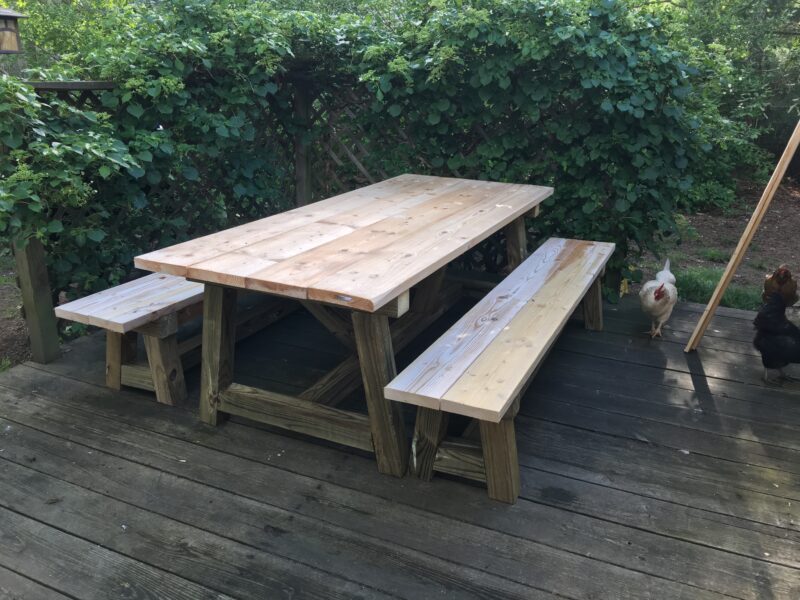
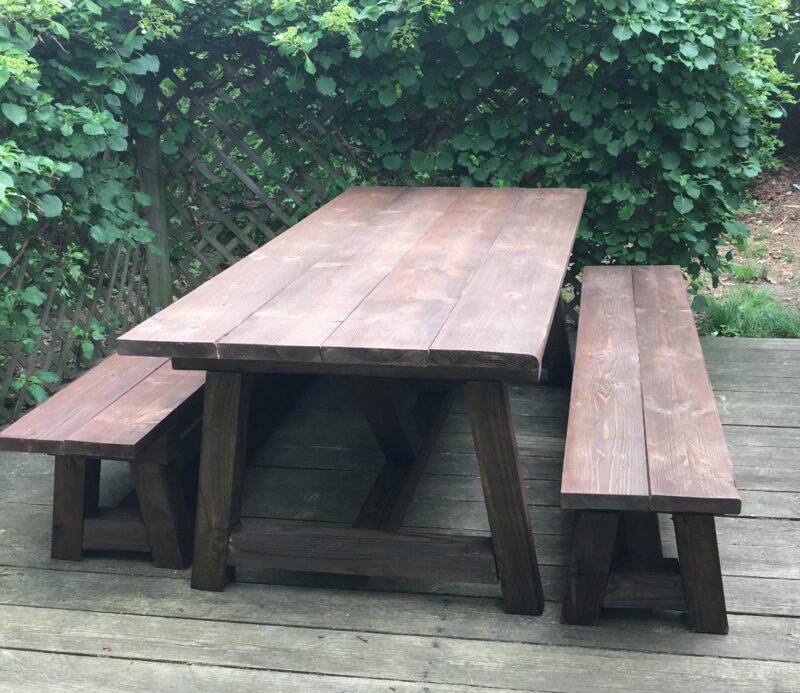
Add in another hour to fill the holes, sand the whole project down, and stain it, it took us about 7 hours altogether to finish it. This is a seriously stable table. It is super heavy so I will be able to leave it out year-round with no fear – tropical storms and nor’easters aren’t going to move this sucker!
Not only did I get an awesome new table, but my son and I built memories I will treasure forever. He will turn 13 at the end of the summer, he is my youngest, with all his sisters already navigating the tumultuous teen/young adult years. It was so sweet to spend this time with him, and he is SO proud of our project!
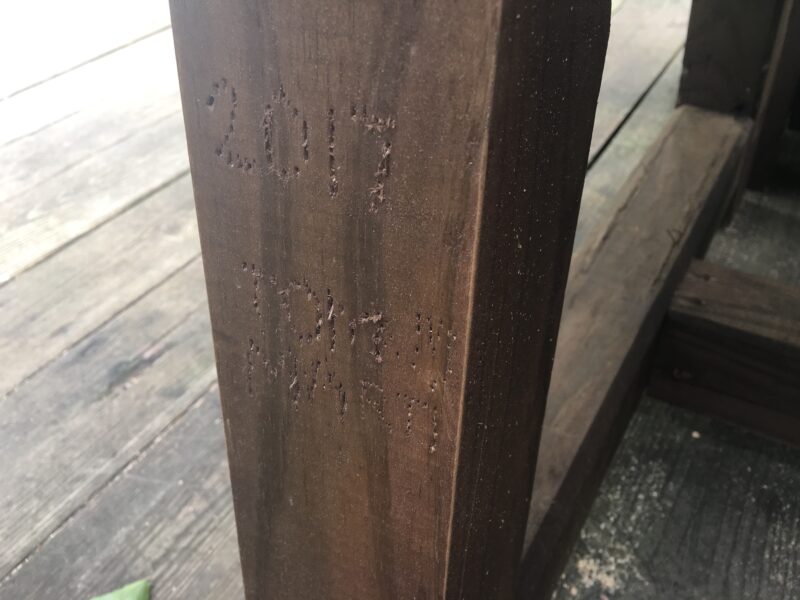
Tommy was really excited when I suggested we sign our work
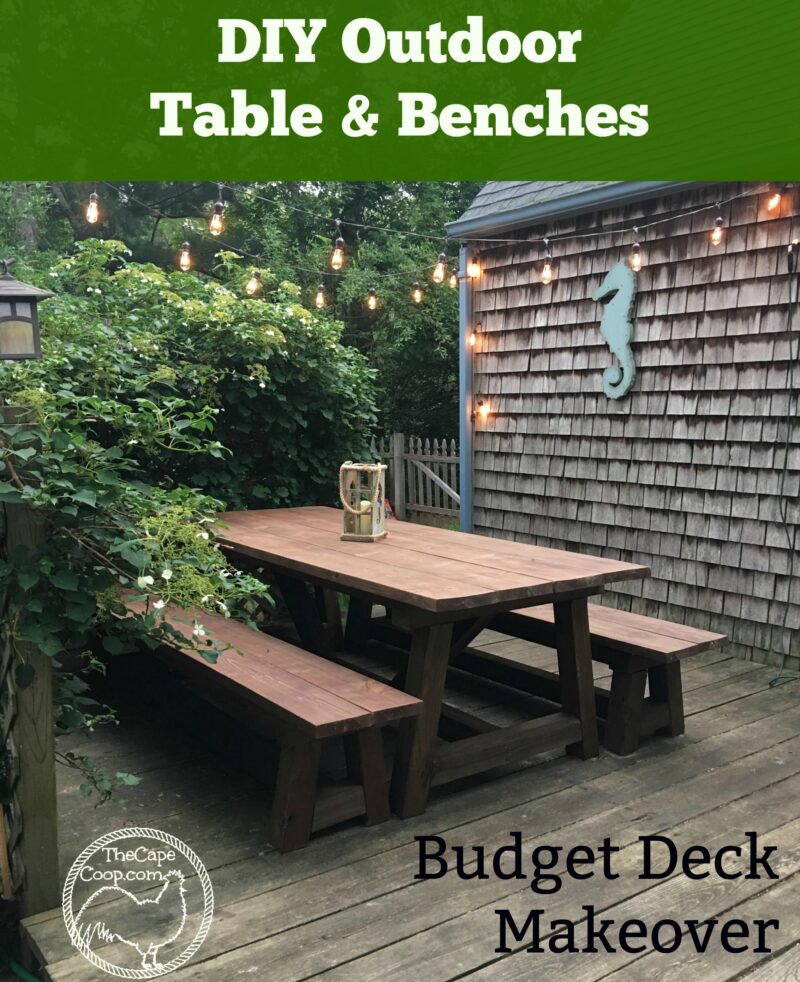
Now we had a great place to eat together as a family, but it needed a few finishing touches. I bought a string of cute lights for $25 and a seahorse to hang on the house for $20 and it is a whole new deck! So for one weekend’s worth of work and about $250 I feel like we have a little outdoor dining room!