---------------------------------------------------------
I love cheese! Hard cheese, soft cheese, melted cheese – it’s all so good! As much as I love cheese I have never tried my hand at making it myself. When I was given the chance to review Gianaclis Caldwell’s amazing book “Mastering Basic Cheesemaking” I was super excited! I have to admit the process of making cheese was somewhat of a mystery to me – I knew it started with milk, and then some magic happens, and poof – cheese!
To say I was a beginner going into this was probably an understatement. This book is definitely geared toward the beginner, which was perfect for me. She breaks down the cheesemaking process into several “lessons” progressing from quick and easy cheeses like ricotta up to harder, aged cheeses like parmesan. Just like in school, each lesson builds on earlier skills. Before I started I read the whole book cover to cover so I had a clear idea of the process and where it was going.
The first section of the book is so helpful when you are just starting out, Gianaclis goes over the tools you will need and explains the ingredients that go into making different kinds of cheese. I am sure she is only scratching the surface of this complex art, but as a beginner, I really appreciated that she kept it simple!

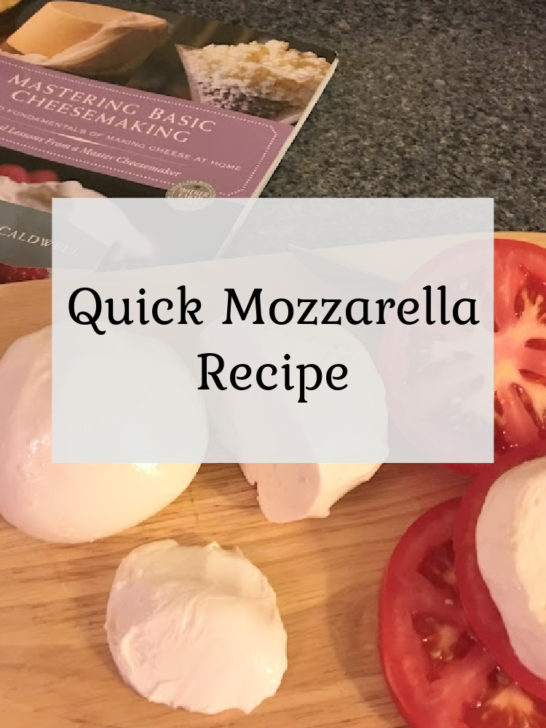
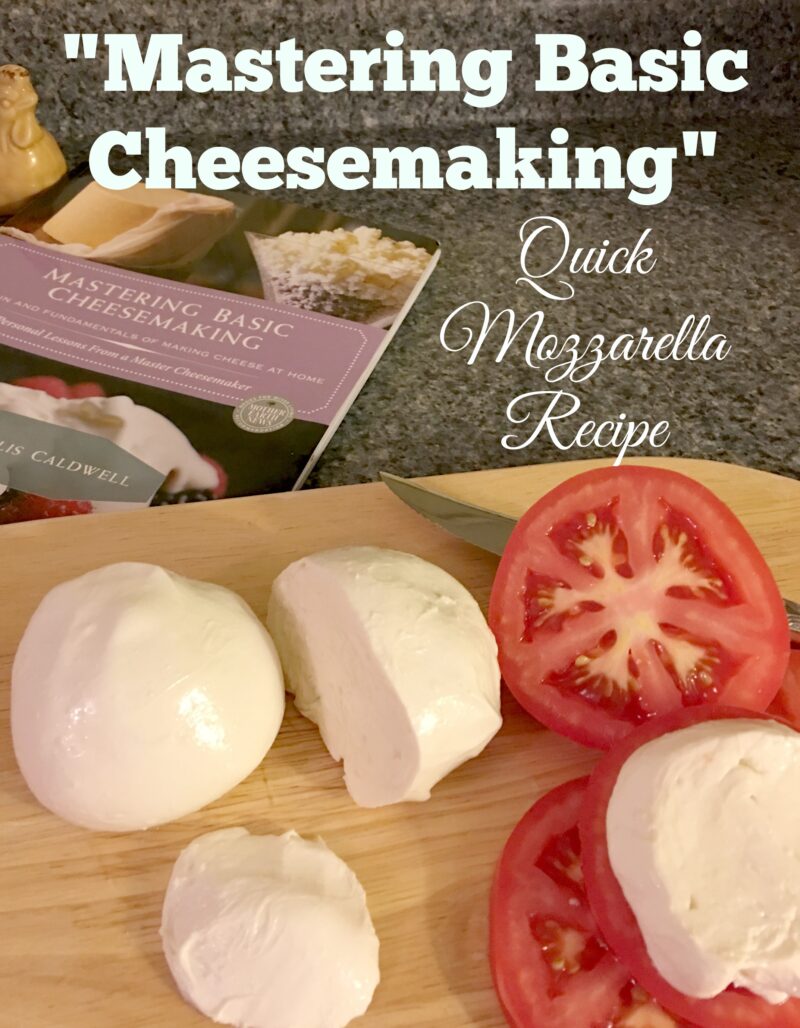
Being the overachiever that I am, I decided to skip ahead to Lesson 12 for “Quick Mozzarella”. I had some tasty red ripe tomatoes in the garden that were just BEGGING for a slice of fresh mozzarella. What is “quick” mozzarella? Well, it’s pretty similar to regular mozzarella, except it can be made and enjoyed in about an hour, whereas regular mozzarella takes all day.
Ready to get started? Check out my first attempt at making cheese!
Quick Mozzarella Recipe
Ingredients:
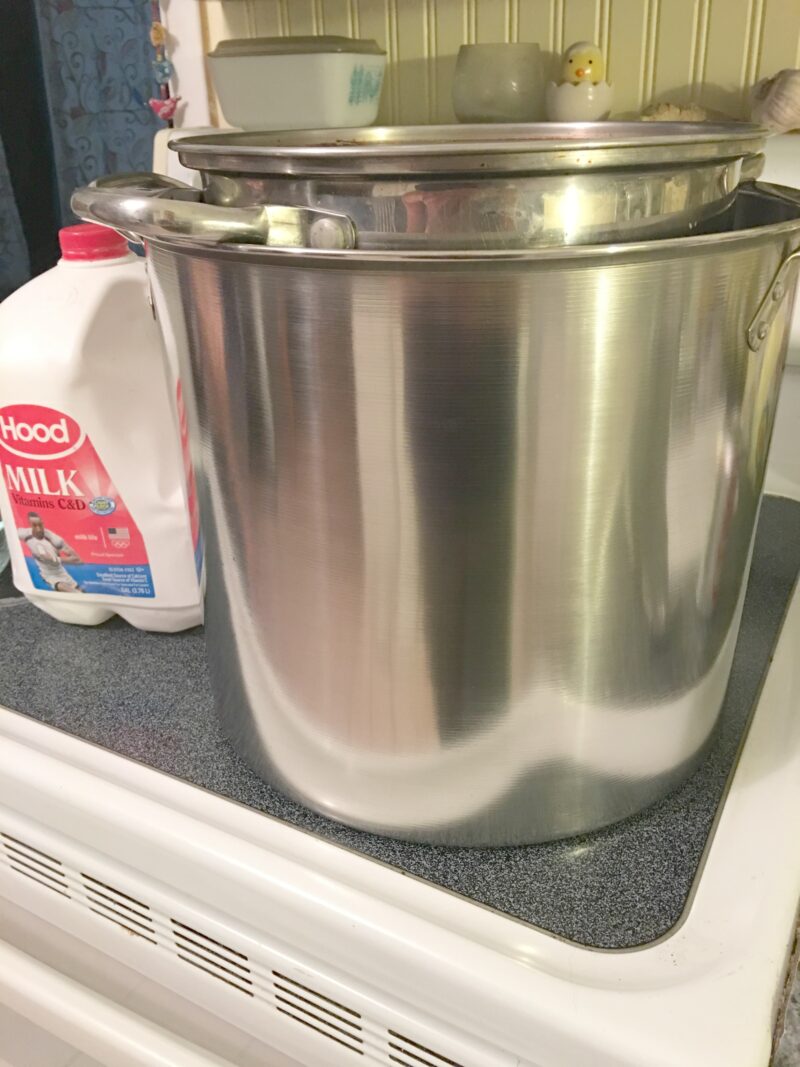
- 1 gallon of cold milk (whole to part skim, grocery store milk is fine)
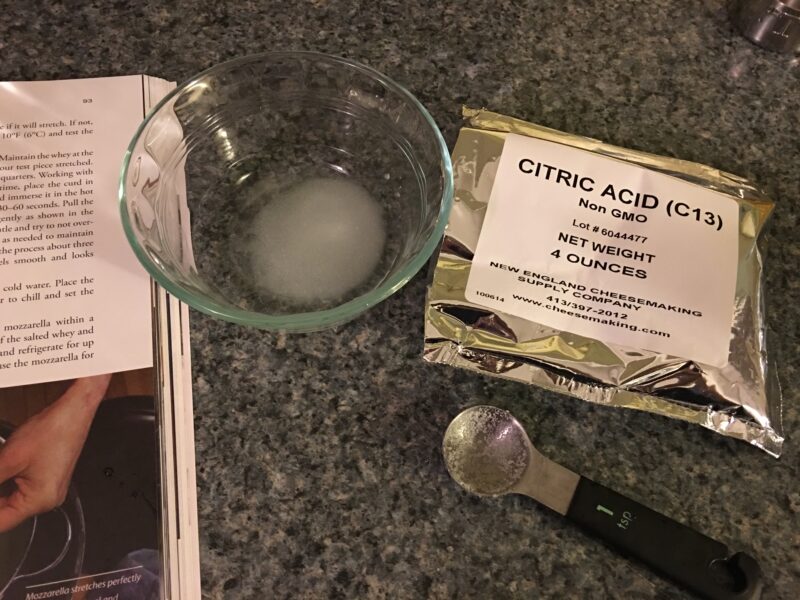
- 1 1/2 tsp citric acid diluted in 2 tablespoons cool water
- 1/8 tsp double-strength vegetarian rennet diluted in 2 tablespoons cool, non-chlorinated water
- 1/2 tsp pure salt (I ordered some cheesemaker’s salt)
Equipment you’ll need:
- two large pots (or double boiler water bath if you have one)
- thermometer
- ladle
- colander
- large bowl
- heavy gloves
- large, flat knife (I used a serrated pie server)
Cheese Making Steps & Tips:
Pour the milk into one of the pots. Add the diluted citric acid. Stir with the ladle
Heat the milk until it reaches 88-90 degrees F. You can place the pot directly on the burner, or for a more gentle warmth place the pot of milk in a water bath. When it reaches 88-90 degrees, turn off the heat.
Stir the milk using an up-and-down motion with the ladle. Stop stirring and pour the diluted rennet into the milk. Begin stirring in an up-and-down motion again for about 10 seconds.
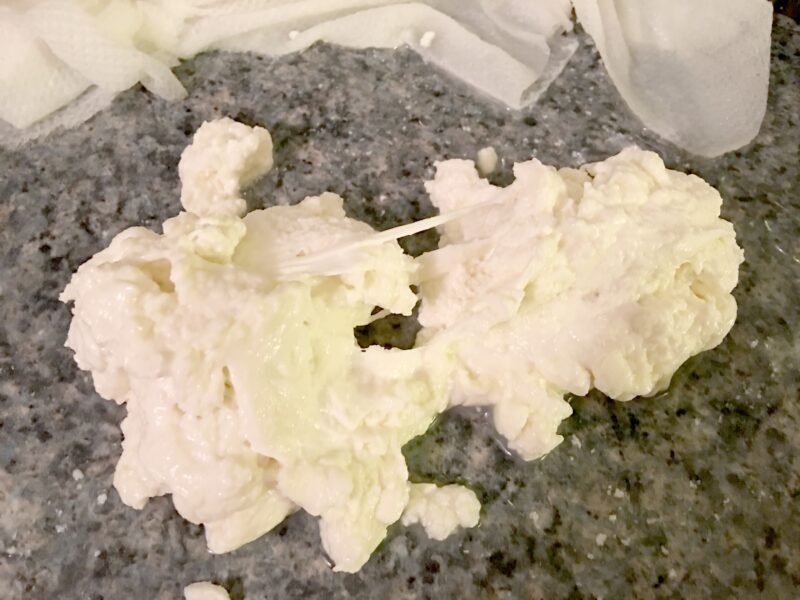
Clean Break
Let the milk sit without being disturbed or jiggled for about 5 minutes. Here is the trickiest “technical” part. The milk will have transformed into curd now. You will know it is done when “clean break” is achieved.
You need to make a cut in the curd about 2 inches long and 1 inch deep. Slip the knife with flat side up at about a 30-degree angle. Slowly lift up the curd. The pressure of the knife should make the cut travel forward. If the break is smooth & clean and the liquid is not whitish then “clean break” is achieved. I had set my timer and checked it at 5 minutes and it was good to go.
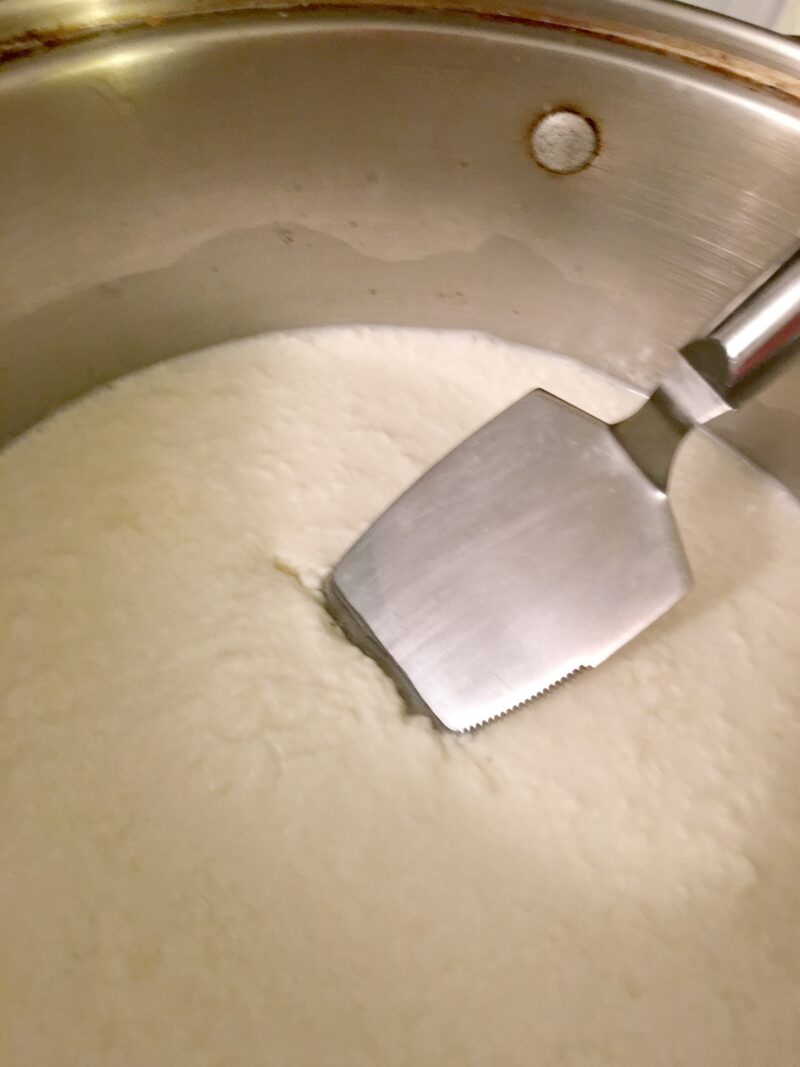
Cutting the curd
Use your knife to cut the curd into 1/2 inch cubes. Cut a grid horizontally & vertically across the pan, then insert your knife into the curds so you are cutting the curd into approximately 1/2 inch layers from the top to the bottom of the pan.
Turn the heat back on. Very gently and slowly you want to stir & heat the curds until they reach 105 degrees F over 5-10 minutes. Make sure you are stirring very gently, you don’t want to break the curds up into super small pieces that will just later drain through your colander holes.
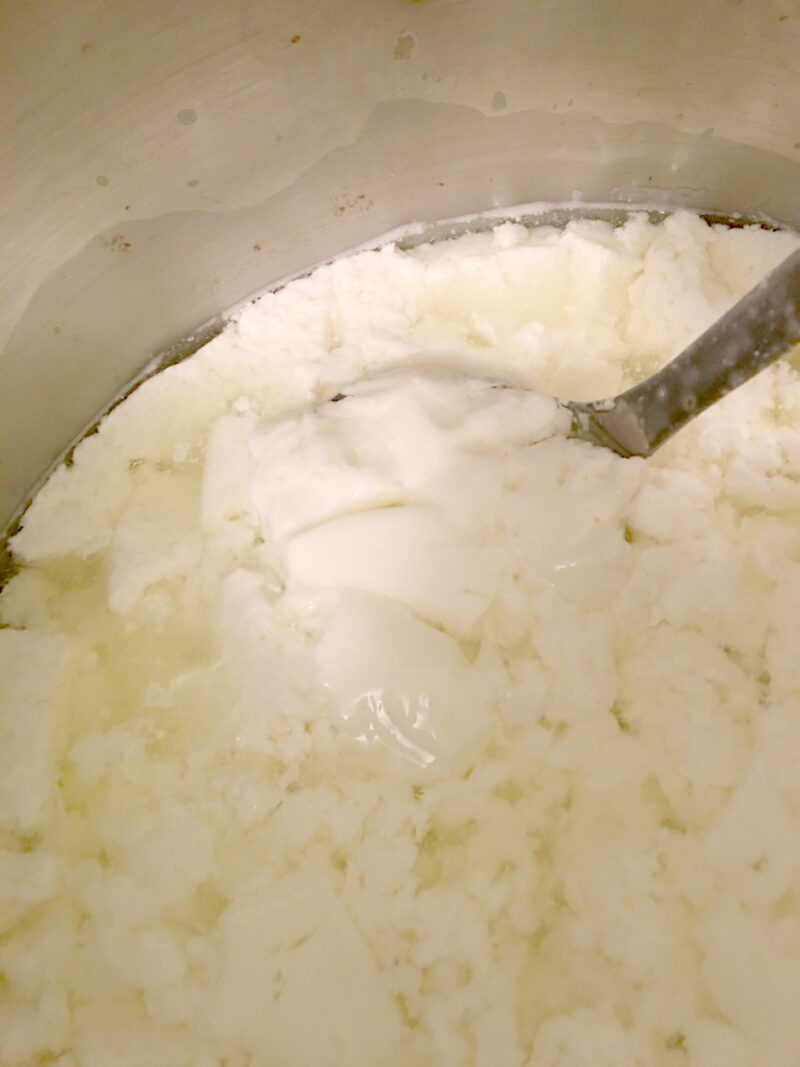
Separate the curds & whey
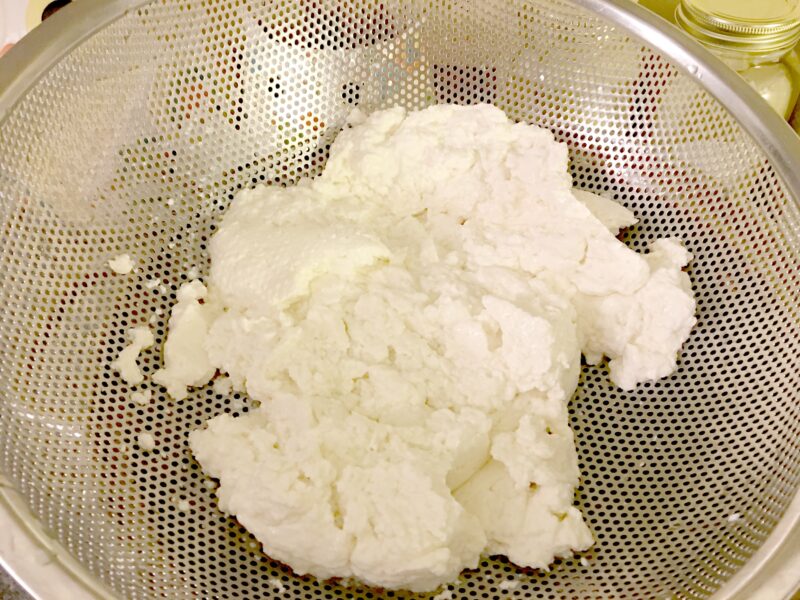
Turn off the heat and remove the curds from the stovetop. Position the colander over the second pot. Pour or ladle the curds into the colander, letting the whey drain into the lower pot.
Add the salt to the pot of whey. Place the pot of salted whey on the stovetop and heat to 150 degrees F on medium heat.
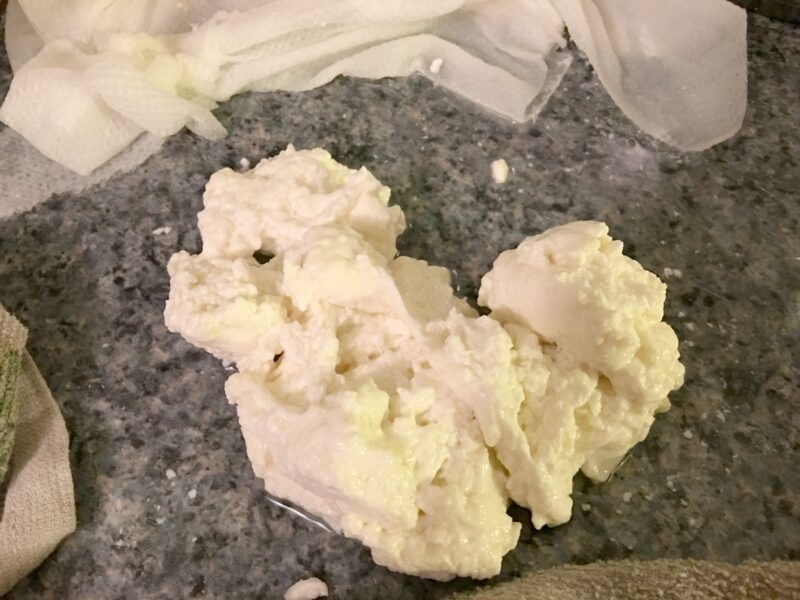
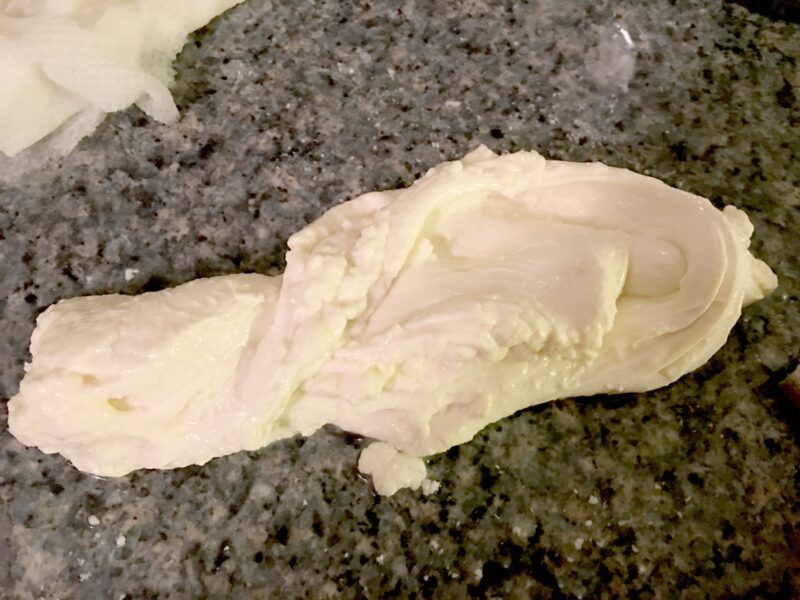
Stretching the curd
Tear off a small piece of the drained curd and place it in the ladle. Immerse the curd in the hot whey for about 15 seconds and pull it out. Gently squeeze and pull the curd to see if it will stretch. If not, heat the whey another 10 degrees and test the curd again. I needed to heat mine to 160 degrees to get it to stretch.
Maintain the whey at the temperature your test piece stretched at. Cut your curd mass into quarters. Working with one quarter of whey at a time, ball it and place it in the ladle. Immerse it in the hot whey for 30 seconds. Pull the curd out and work it gently. Very gently knead and stretch it. You are trying to work it into a solid mass, but you don’t want to overwork it. The curd will be HOT when you pull it out of the whey. You might want to use some heavy gloves for this part.
Reheat the curd as needed to maintain a pliable texture and until the curd feels smooth and looks shiny. I had to dunk my curd ball 4 times, kneading and stretching in between each dunk.
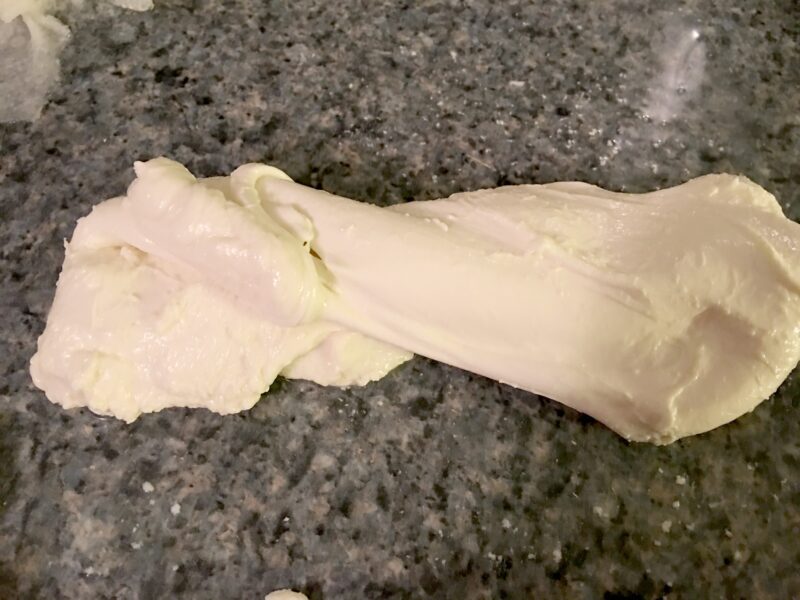
Setting the cheese
Fill a bowl with cold water with some ice. Place the formed balls into the water to chill and set the shape.
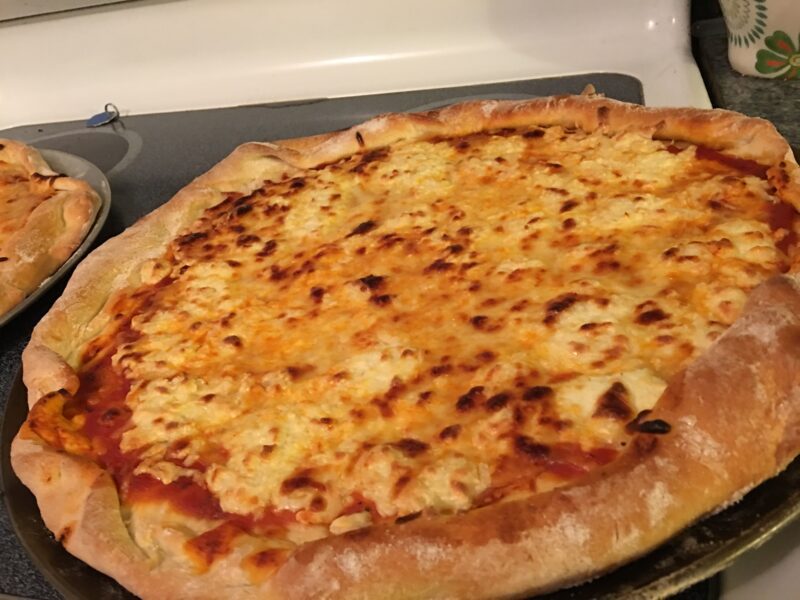
Use your mozzarella within a few hours, or chill some of the salted whey and store the mozzarella in it, refrigerated for up to a week. If you want to use the mozzarella for pizza, wrap it tightly in plastic and refrigerate for up to a week (wait at least 2 days before shredding it though). I made some pizza a couple of nights later and it was awesome to know I had made the crust, sauce & cheese!
That’s it! Not too bad right? Honestly, the whole process was fascinating to me. I love seeing how things work, how they are made, and the process behind the product. I definitely have a greater appreciation for cheese now, and I can’t wait to move on and try some of the other awesome recipes in this book! I hope you will check this book out and try some too, I’d love to hear about it if you do!

L. Lipowitz
Friday 19th of April 2019
What a great tutorial! I really appreciate the step by step captioned pictures, they really helpful to a beginner. I was pleased to see there is a vegetarian renet option. Is this possibly do-able with vinegar or lemon juice with a similar result?
Liz
Monday 22nd of April 2019
It isn’t something I have experimented with - I am definitely still a beginner so I’ve only been sticking with proven recipes and haven’t branched out to making up my own! Maybe experiment with a small half batch and see how it goes?
Rhiana
Monday 8th of May 2017
Great Pictures!